Sometimes, it can be useful to add a hard drive or USB memory to our Proxmox setup, especially if we have a mini PC with limited expansion possibilities.
We'll see how to add a USB hard drive to an LXC where we'll use it and also share its content via Samba.
#### Note: The LXC must have privileges for us to add the disk.
There can be various uses, such as:
- Hosting Torrent files and making them available on the network
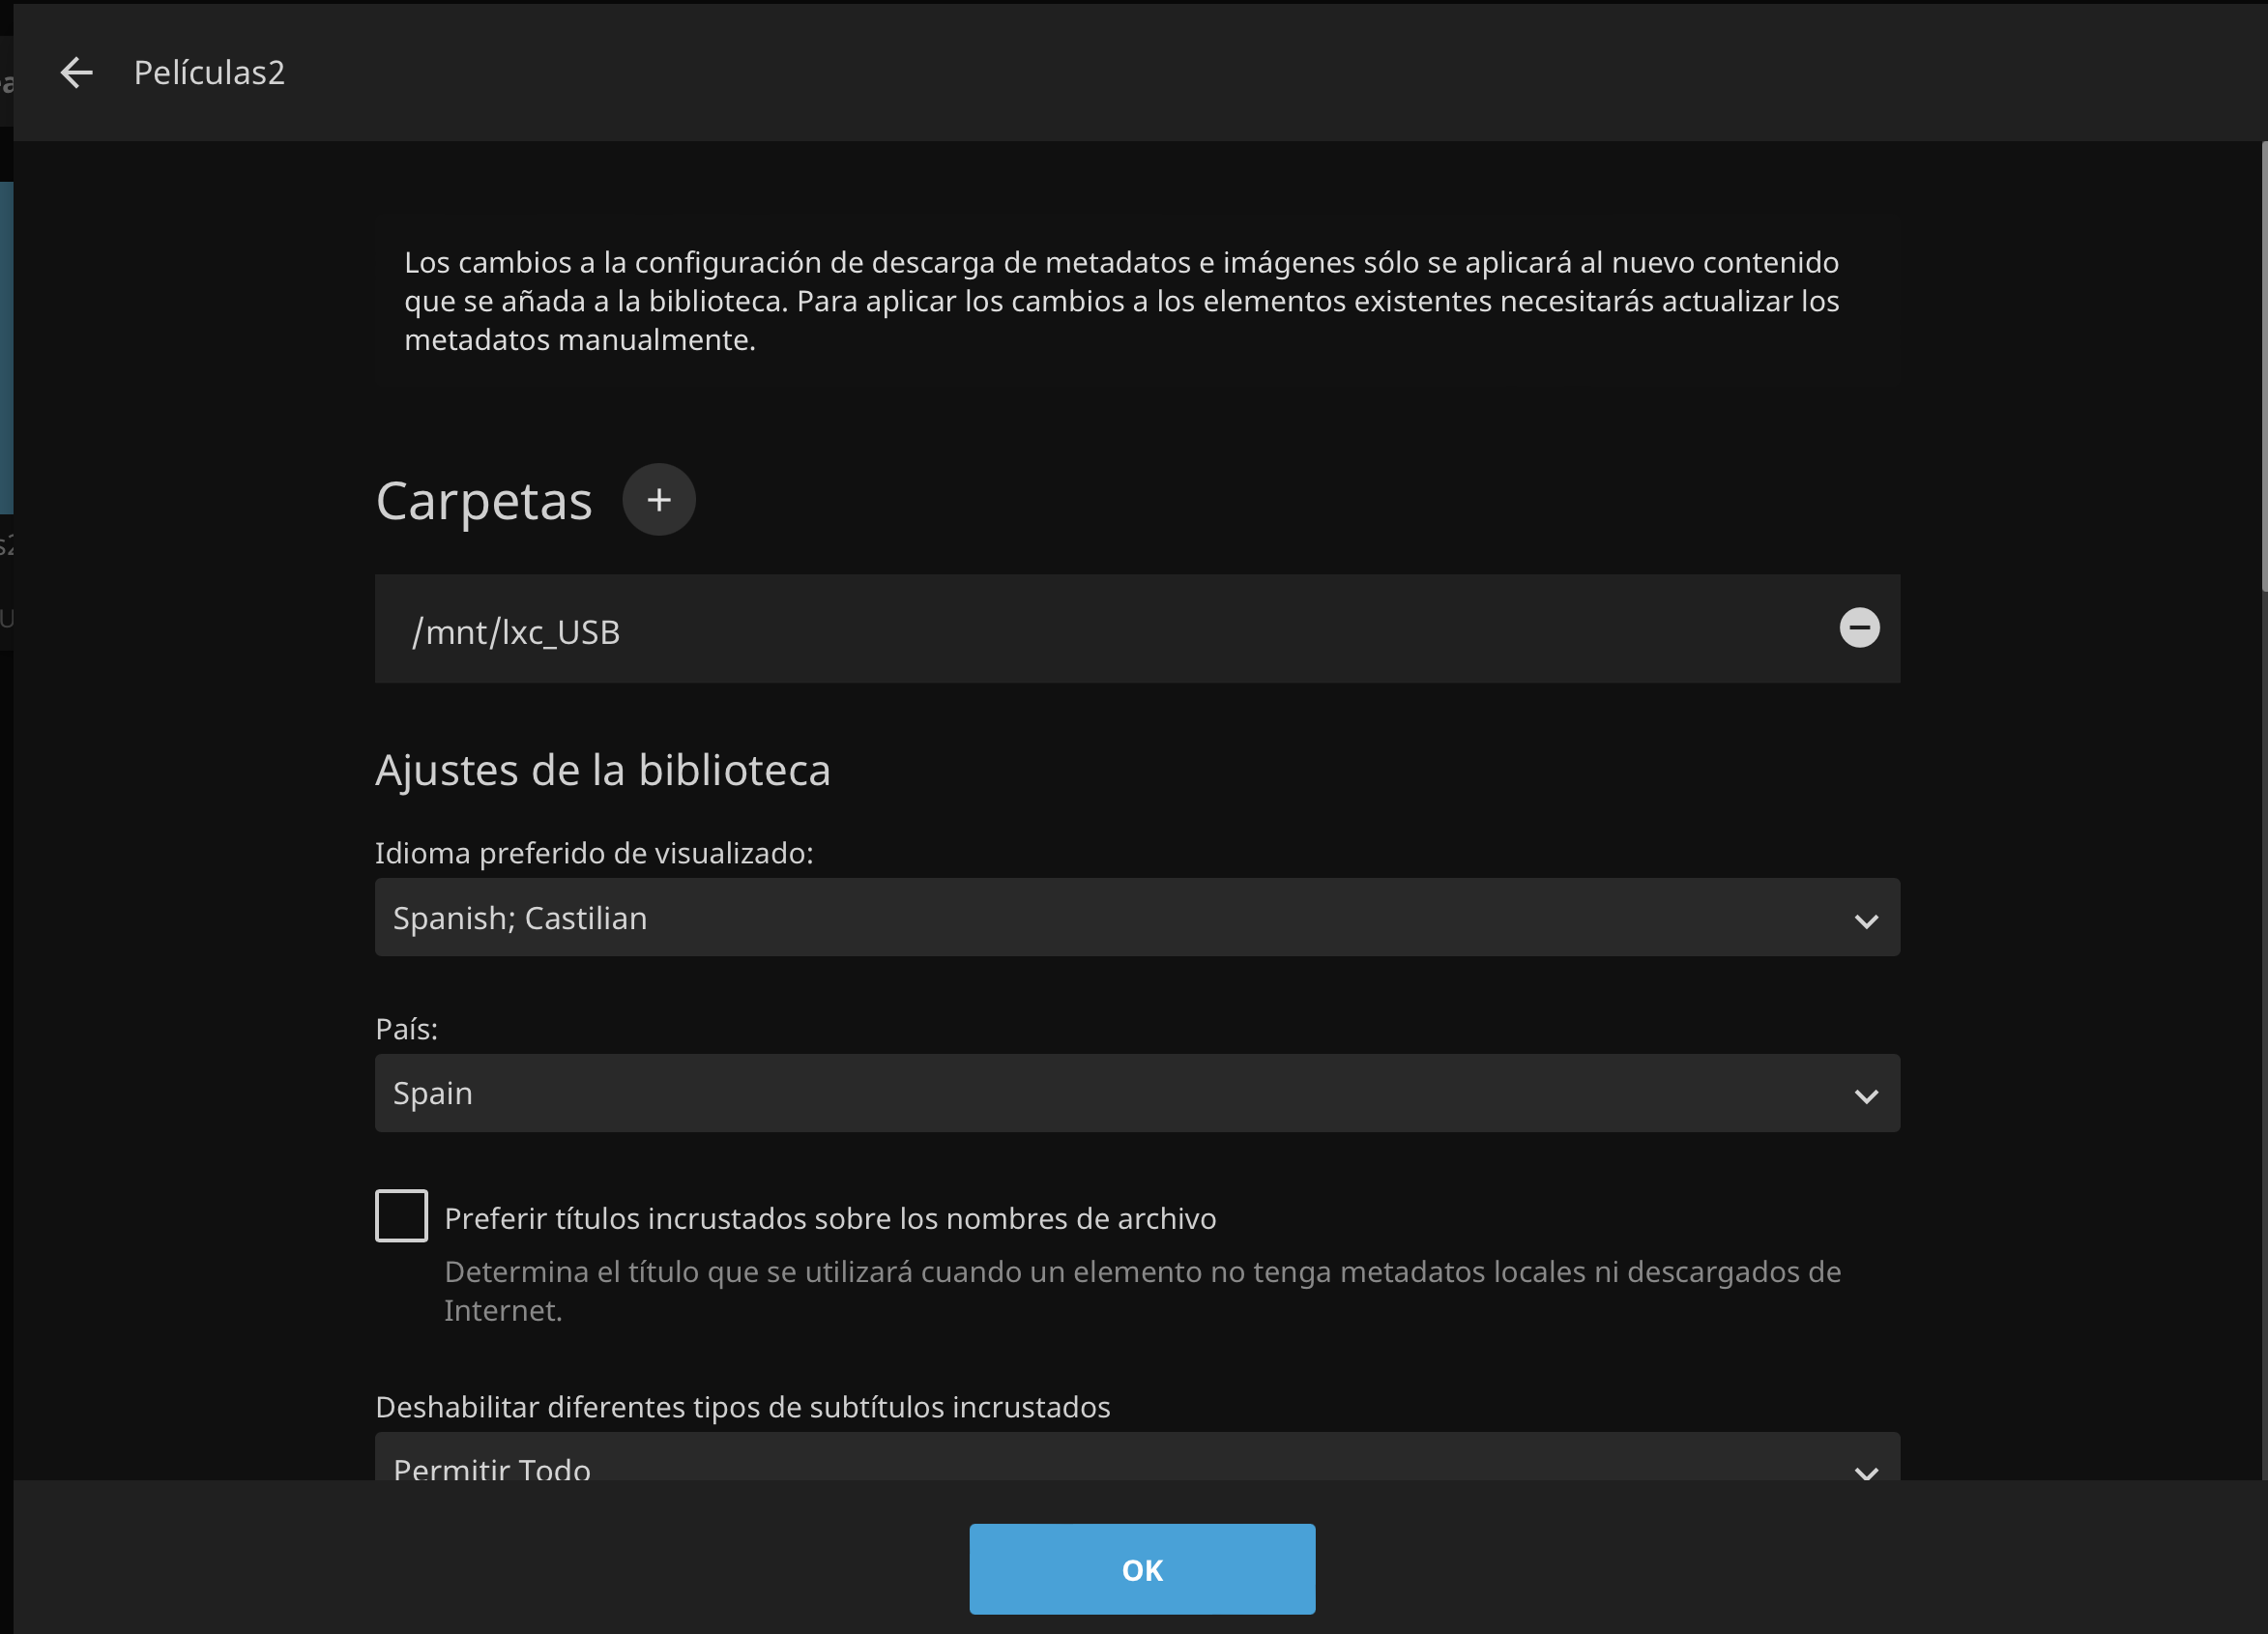
- Using it with our media server
- Using it to host documents that are auto-scanned with Paperless
- And many more...
We will:
1. Add the USB disk to the LXC
2. Install Samba
3. Configure the disk sharing
## 1. Adding USB disk to our LXC
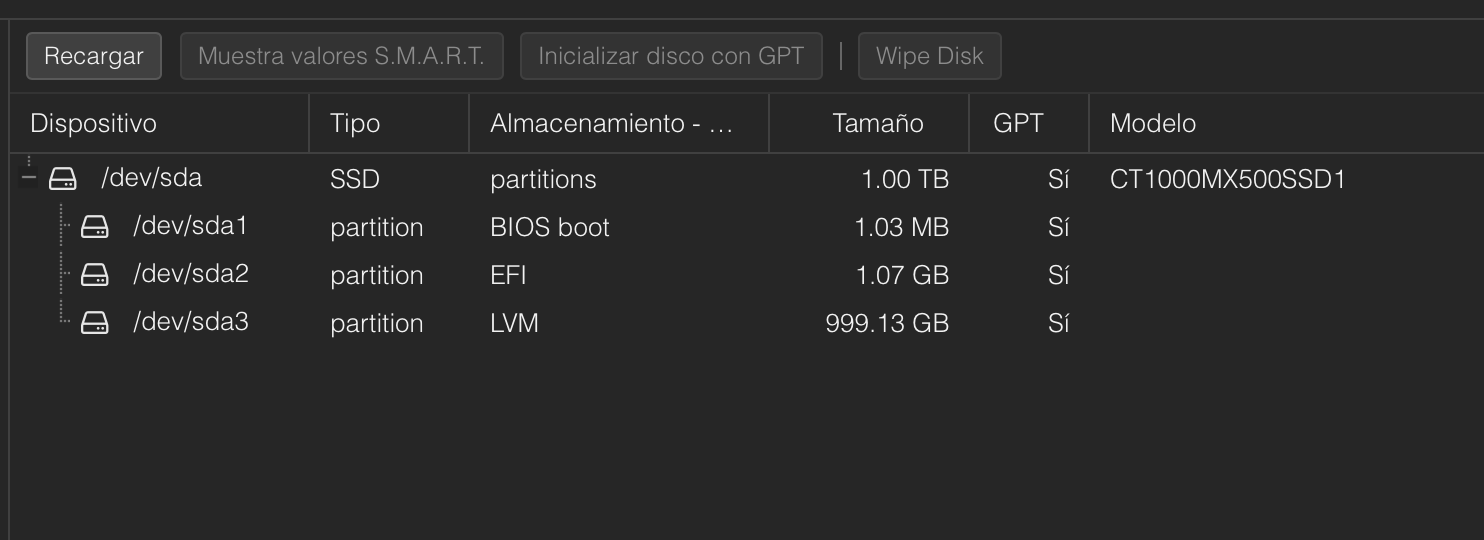
### 1.1 Identify the USB disk or memory
To do this, it's as simple as looking at the disk section we have on our server before and after connecting the USB disk.
Before adding our disk:
After adding our USB disk:
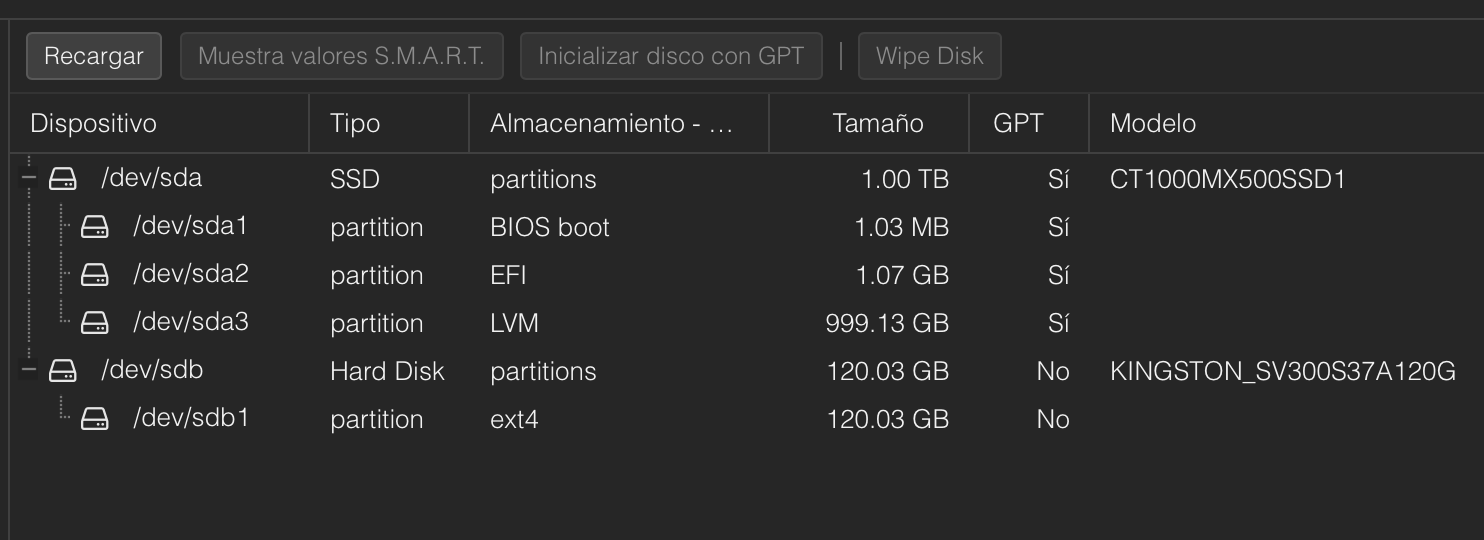
### 1.2 Format the disk
For us to use it, we have to format it in a compatible file system, for example ext4 in the case of a hard drive. We do this from the Proxmox console:
```bash
mkfs.ext4 /dev/sdb1
```
### 1.3 Create the mount directory in the LXC
We can name the directory whatever we want:
```bash
mkdir /mnt/lxc_USB
```
### 1.4 Create a mount point in our LXC
To do this, we go to the Proxmox console (not in the LXC), and edit the LXC's configuration file. Change the id (100) to the corresponding one for your LXC:
```bash
nano /etc/pve/lxc/100.conf
```
Add this line to the file:
```
mp0: /dev/sdb1,mp=/mnt/lxc_USB,backup=0
```
### 1.5 Start the LXC and set permissions
Start the LXC, log in, and give permissions to the mount directory:
```bash
chmod -R 777 /mnt/lxc_USB
```
## 2. Install Samba
Now that we have our disk mounted, let's install Samba to share it over the network.
### 2.1 Install Samba inside the LXC:
```bash
apt-get install samba -y
```
Confirm the service is running:
```bash
systemctl status smbd.service
```
### 2.2 Create a new user
Create a new user with the name we want, add a password for the user and confirm everything:
```bash
adduser proxmenux
```
Now let's add the new user to Samba:
```bash
smbpasswd -a proxmenux
```
### 2.3 Set permissions
Set the permissions for the proxmenux user to the path where we mounted the disk:
```bash
apt-get install acl
setfacl -R -m "u:proxmenux:rwx" /mnt/lxc_USB
```
## 3. Configure Samba sharing
### 3.1 Edit the Samba configuration file
Edit the smb.conf file to share the disk directory:
```bash
nano /etc/samba/smb.conf
```
At the end of the file add:
```
[lxc_usb]
comment = shared folder
path = /mnt/lxc_USB
read only = no
writable = yes
browseable = yes
guest ok = no
valid users = @proxmenux
```
## 4. Verify access and usage
We now have our Samba server installed and our USB drive shared. Let's verify that we can access it:
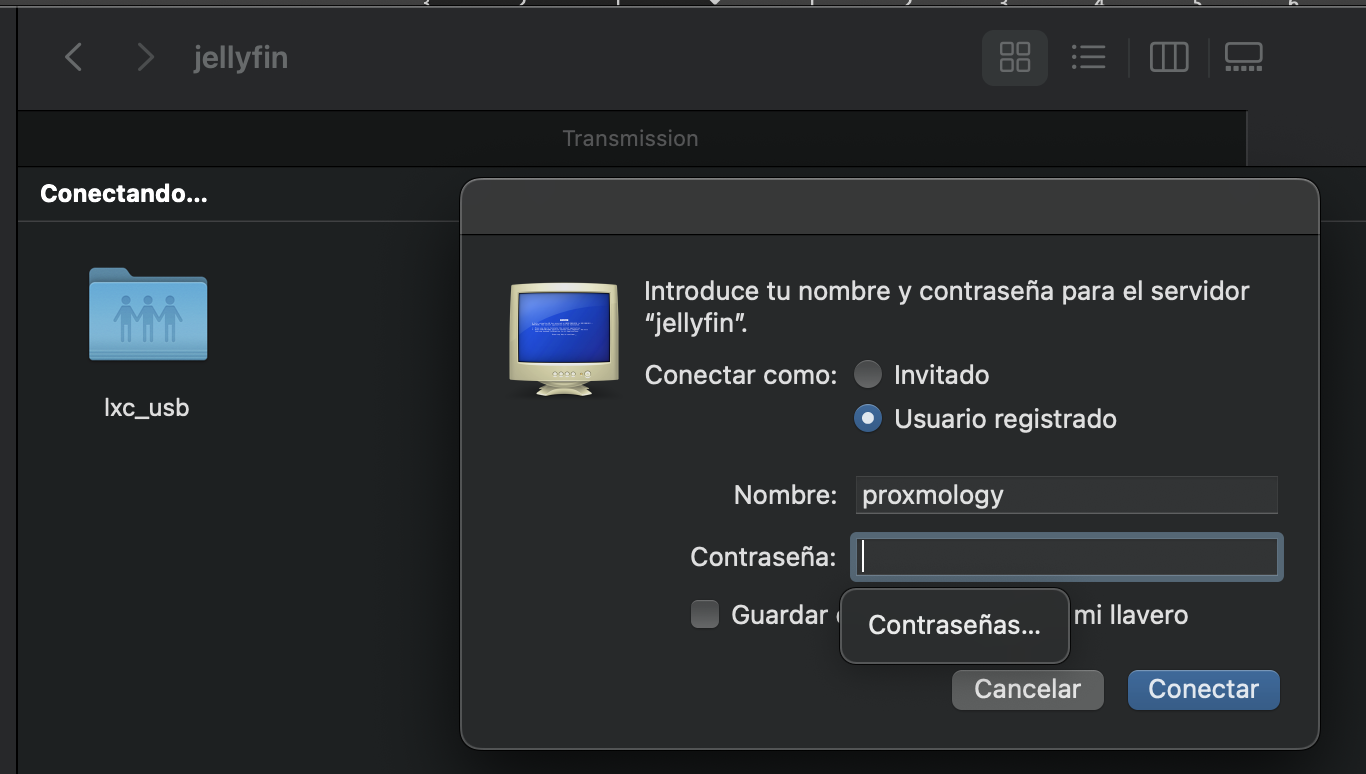

Now we can use our hard drive, use it inside the container and also share its content: