2.4 KiB
title, description
| title | description |
|---|---|
| Install Kodi in an LXC and Connect it to a Monitor/TV Using GPU Acceleration | Install Kodi in an LXC container on Proxmox, utilize GPU acceleration, and connect it to your TV, turning your Proxmox server into an all-in-one media center. |
We'll use the script created by user mrrudy.
To be able to use a keyboard, mouse, or any USB controller after installation, we must install the container with privileges.
bash -c "$(wget -qLO - https://raw.githubusercontent.com/mrrudy/proxmoxHelper/main/ct/kodi-v1.sh)"
Be patient, it takes time to install. Access to tty7 means we can now connect our monitor or TV.
Keyboard, Mouse, or USB Controller
The keyboard, mouse, or USB controllers are /dev/input devices. To add them to the LXC, we need to know their code:
ls -l /dev/input
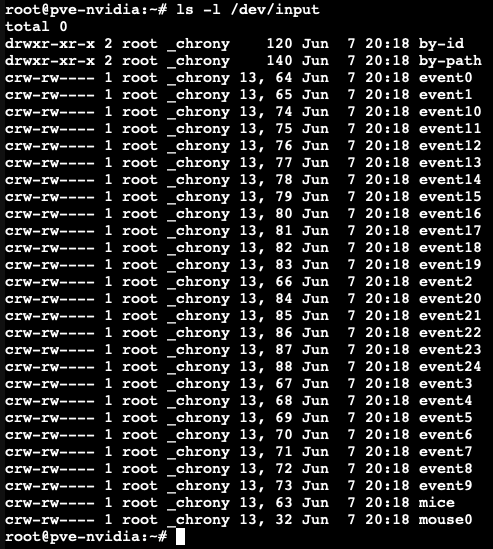
In my case, the code is 13.
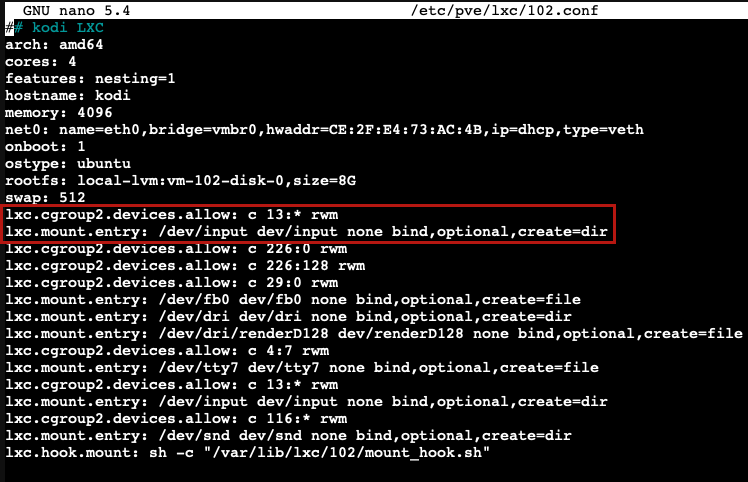
We add to our LXC configuration: For example, 102 is the id of my Kodi container
nano /etc/pve/lxc/102.conf
Add these lines:
lxc.cgroup2.devices.allow = c 13:* rwm
lxc.mount.entry: /dev/input dev/input none bind,optional,create=dir
When we're done, we restart Proxmox:
reboot
Updating Kodi
Inside the container's console:
sudo add-apt-repository ppa:team-xbmc/ppa
sudo apt install kodi kodi-bin
When it's finished, we restart, and when it boots up, we'll have Kodi updated.
Images
We can learn more about configuring an LXC with Intel GPU on Konpat's blog.

If you found this tutorial helpful and useful, you can buy me a Ko-fi! Thank you! 😊